Gas Station Dance Photo Guide: Pick the Right Face for Each Role
See the actual three input portraits, choose who gets the opening and car-door reveal, and avoid ambiguous group shots, tiny faces and unsupported files.
Last updated: 2026-10-05
Pick the roles before you browse your camera roll. The person who should open the clip may not be the person you want returning in the last selfie.
You need one clear adult subject per photo. You do not need a gas station, a car or a dance pose in the input. The setting and movement are generated.
Role 1: the opening dancer
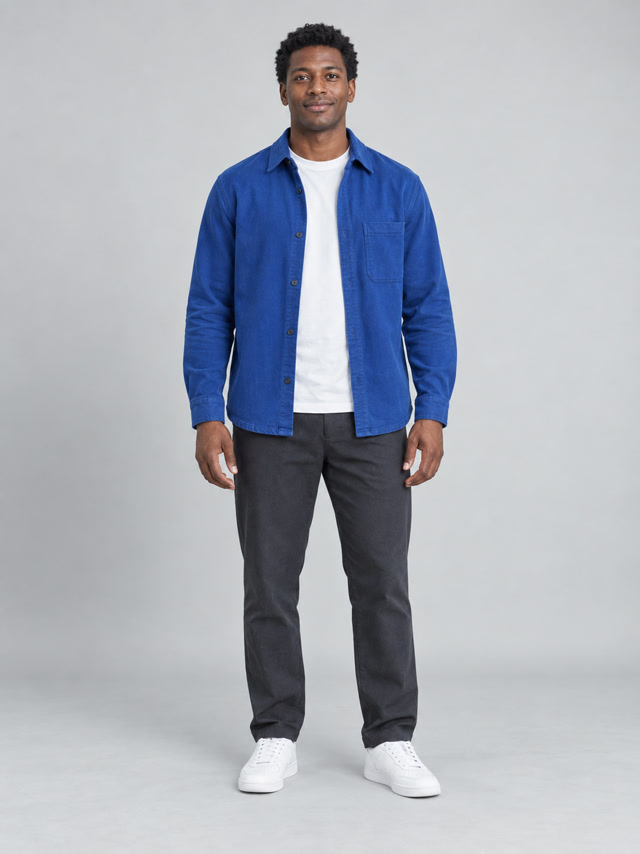
Choose the person you want to introduce the scene. In our example, the first portrait supplies the character in the blue overshirt.
Start with a solo photo where the face and some upper body are visible. Do not spend time finding a photograph of your friend doing the exact dance: the generator supplies the movement.
Role 2: the selfie character who returns
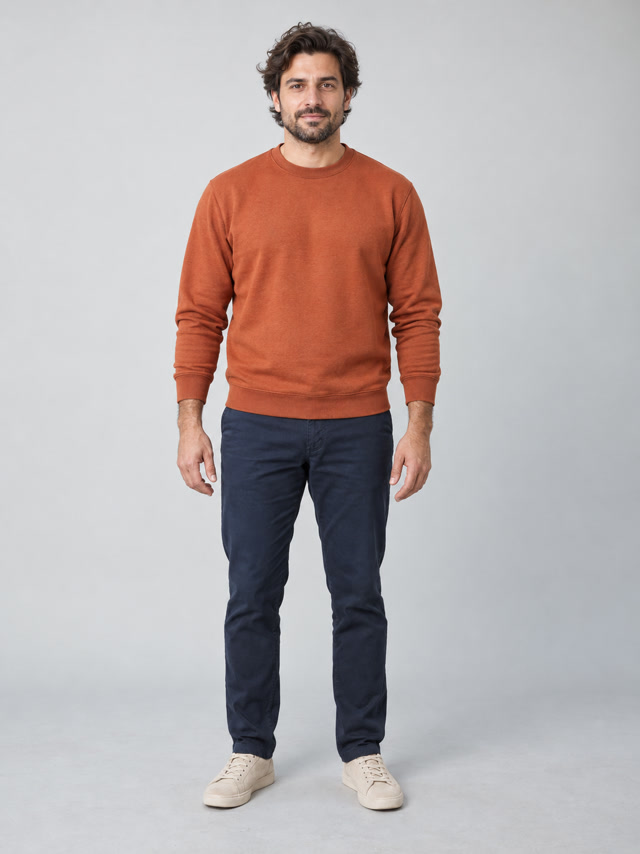
This is the role to think about twice. The character appears when the camera turns and again at the end of our example.
Use a photo in which you can comfortably inspect the face. A front-facing or slight three-quarter portrait is a practical starting point. A hand over the mouth or dark sunglasses removes details you would otherwise use to compare the result.
If you are making a three-friend joke and want one friend to feel like the person recording it, assign them here rather than in the dancer slot.
Role 3: the car-door reveal
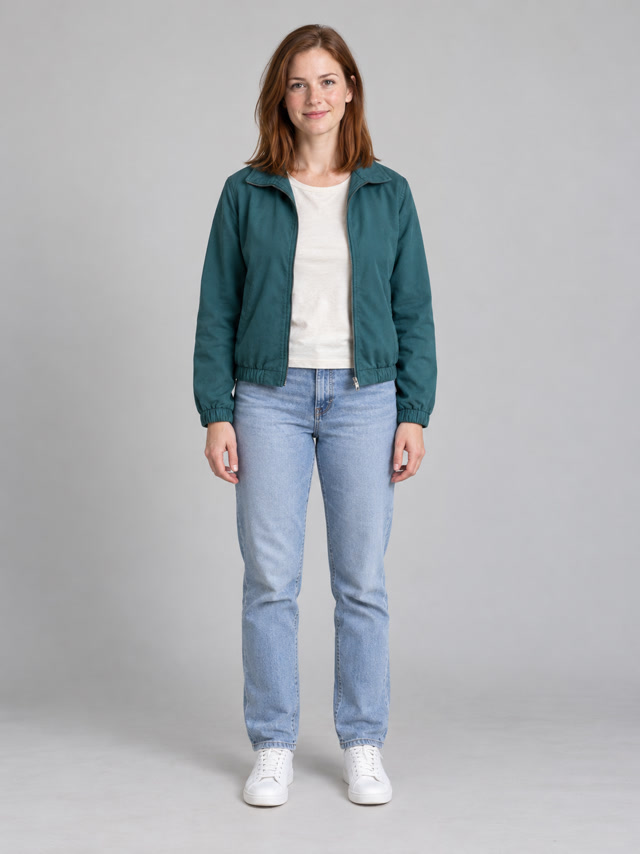
Put the person you want to reveal later in this slot. You do not need a picture of them sitting inside a car.
Avoid a distant figure where you can identify the jacket but barely see the face. The generated entrance is not a reason to upload a car photo or a group beside a car.
How much should you crop?
Keep the whole face, including the forehead and chin, and enough of the upper body to make the subject unambiguous. Do not cut to just the eyes or mouth. If a crop leaves only a handful of pixels for the face, use another photo instead of enlarging it.
Actual full-body input
Upper-body framing illustration
The right view illustrates a crop; it was not a separate generation input. Our published test used the full-body photo on the left.
To use a different crop, save a copy in your photo editor and upload that copy. The page illustration does not crop your upload for you. For a group photo, the same principle applies: keep one intended person and remove the other faces.
Compare these choices before uploading
A solo portrait vs a group photo: use the solo portrait. If you only have a group shot, make a copy containing just the consenting person's face and upper body. If that crop is too small or blurry, choose another image instead.
A clear face vs an obstructed face: choose the image without a hand, phone or sunglasses covering important facial details. This makes the intended subject easier to identify.
A normal photo vs a heavily filtered photo: prefer the one you would use to recognize your friend. An edited image may describe the filter's appearance rather than the person you want.
A high-resolution file vs a tiny social-media thumbnail: use the clear original when it fits the upload limit. If the file exceeds 8 MB, export a smaller copy without shrinking the face to a thumbnail.
Compare your choices with the tested inputs
The three portraits on this page were the inputs for one complete generated video. They depict fictional adults, not customers. See both sides before deciding how close the output is to the input.
The portraits have different clothing colors, making the roles easy to follow. Generated faces and outfits can still change: use the full example to judge whether the resemblance suits your clip.
A last check before Generate
- Every photo shows one intended adult, with permission to use their image.
- The face is visible at the size shown in the upload preview.
- The first photo is the dancer; the second is the returning selfie character; the third is the car-exit reveal.
- Each file is JPG, PNG or WebP, no larger than 8 MB, and at least 320 pixels in both dimensions. Avoid extreme panoramas and files above 36 megapixels.
- You have watched the full example and understand that the output is a generated scene, not an exact copy of the source reel.
Ready to place the photos? Continue with the step-by-step tutorial. After generation, check the whole video, including the return selfie, before sharing.